Since there are no news about Sailfish SDK getting official support for Apple M-series chips and I would really like to build apps on my Mac, I decided to see if I could get it running myself and voila! Through a somewhat convoluted combination of Apple’s Virtualization framework, Rosetta and QEMU, you can get Sailfish IDE and the build system running in an Ubuntu VM running on your Apple Silicon Mac. The performance of the VM itself is really great, but the builds will be slow since QEMU is slow.
Full disclosure: I used LLMs during my investigations but I still did a lot of digging and work myself, and the guide below is written just by me. This is also a pretty hacky solution, but my main goal was to get something usable working, not for it to be perfect.
This is tested on macOS Tahoe 26.6 with Sailfish SDK 3.13.5. If you’re running macOS Sonoma, you might have to upgrade to Tahoe because of this bug: MacOS Rosetta broke on latest kernel Fedora 41 (rosetta error: unhandled auxillary vector type 29) · Issue #3592 · lima-vm/lima · GitHub. The tutorial assumes you have some Linux knowledge.
Now, let’s get started:
-
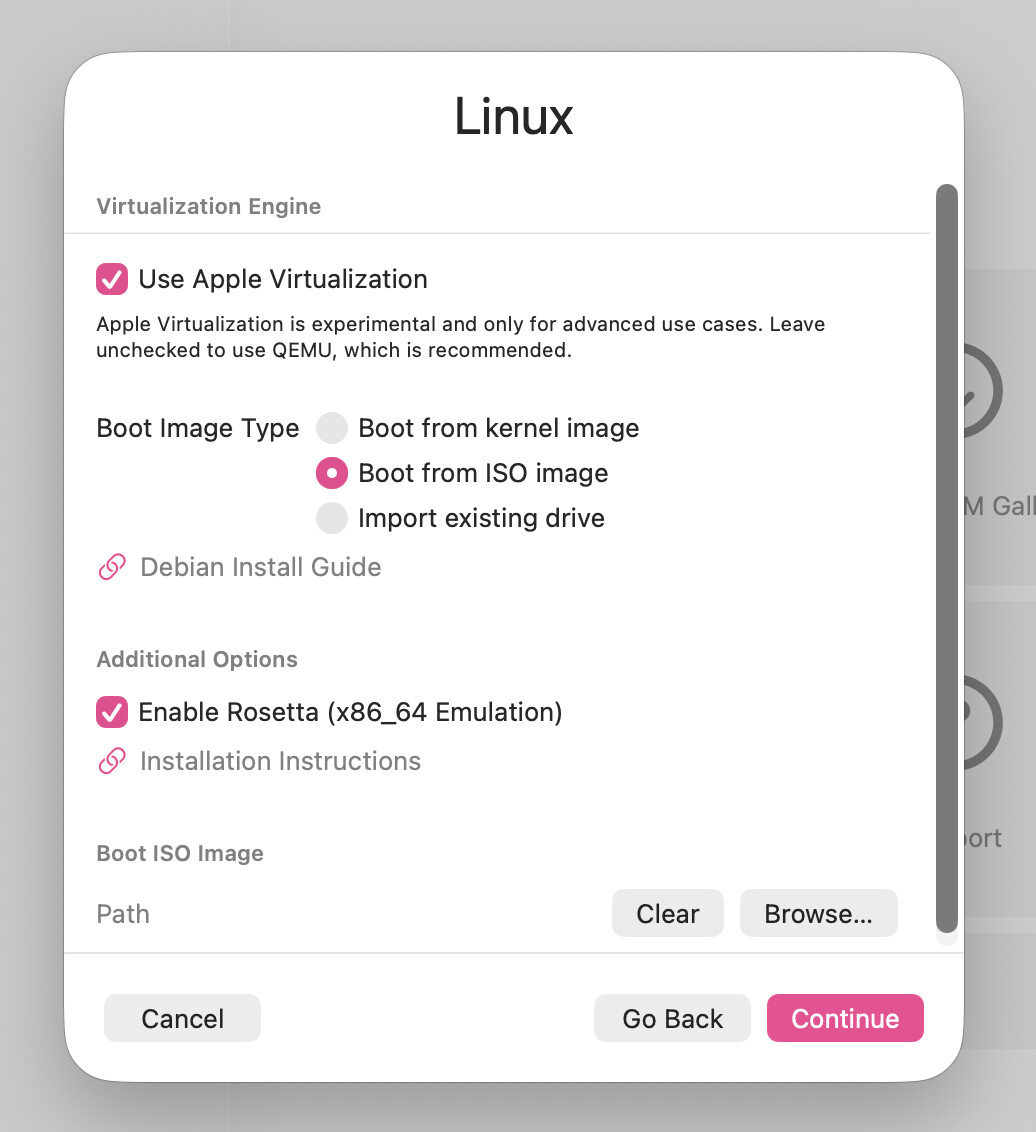
Install UTM and create a new Ubuntu 26.04 (other versions are not tested) ARM64 VM with Apple Virtualization and Rosetta. It’s important you select Virtualize, not Emulate when creating the VM. I recommend giving it at least 8GB of RAM and 32GB of storage (I tested with 64GB). You can download the ISO from https://cdimage.ubuntu.com/ubuntu/releases/resolute/release/ubuntu-26.04-desktop-arm64.iso.
-
Install Ubuntu normally and reboot your VM into it. From now on, everything will be performed in the virtual machine.
-
Install Docker Engine according to the official instructions: Install Docker Engine on Ubuntu | Docker Docs
-
Complete Docker post-install steps too to make sure
dockercan be run withoutsudo. SFOS SDK requires this: Linux post-installation steps for Docker Engine | Docker Docs.Make sure to log out and in again. Run
docker run hello-worldwithoutsudoto verify it works. -
Set up Rosetta according to the UTM instructions: Rosetta | UTM Documentation. If you reboot the VM you might need to redo the “Enable Rosetta” step.
-
Install QEMU binfmt:
sudo apt install qemu-user-binfmt. We’re going to use it for running the build engine container, which is i386 and cannot be run with Rosetta alone. This is also the reason the Mac SDK doesn’t work on AS. -
By default, qemu-i386 binfmt config doesn’t have the “credentials” flag, which is required for the build engine to get configured correctly. To fix that, we need to set up an override:
sudo mkdir -p /etc/binfmt.d
sudo cp /usr/lib/binfmt.d/qemu-i386.conf /etc/binfmt.d/qemu-i386.conf
sudoedit /etc/binfmt.d/qemu-i386.conf
In the editor, scroll to the right until you see letters “OPF” in the end (they might be in a different order or there might be fewer letters, that’s fine).
Add a “C” letter there, so that it looks like “:COPF”. Save the file and exit the editor.
Then run:
sudo systemctl restart systemd-binfmt
cat /proc/sys/fs/binfmt_misc/qemu-i386
The output should look something like this:
enabled
interpreter /usr/bin/qemu-i386
flags: POCF
offset 0
magic 7f454c4601010100000000000000000002000300
mask fffffffffffefefcfffffffffffffffffeffffff
The important part is that the
flagsfield containsC. -
Install amd64 packages required for the SDK to run:
sudo dpkg --add-architecture amd64 sudo apt update sudo apt install qtbase5-dev:amd64 -
Download the latest Sailfish SDK from Sailfish SDK | Sailfish OS Documentation and run it:
chmod +x SailfishSDK-...-linux64-online.run
DOCKER_DEFAULT_PLATFORM=linux/386 ./SailfishSDK-...-linux64-online.run
The
DOCKER_DEFAULT_PLATFORM=linux/386part is very important to make sure the installer creates the Docker image with the correct architecture. -
Go through the installation steps. Make sure that Docker is selected as the build engine backend (it should be selected automatically if everything is set up correctly).
You can leave all of the options on their default values. The most important part of the installation is the build engine, if it fails make sure you set everything up in the previous steps correctly, especially QEMU.
Once the installation finishes run the following command in the terminal to make sure that the build engine image is correct:
docker image inspect "sailfish-sdk-build-engine:${USER}" --format '{{.Os}}/{{.Architecture}}'.It should say
linux/386. If it does, you can celebrate a little , but don’t launch Sailfish IDE yet. We have a few more things to set up.
 -
Now we need to patch the build engine Docker image. While QEMU does most of the work for us, the container won’t start properly and will hang indefinitely because some of the tools don’t work as expected in our emulated environment.
Thankfully, we don’t actually need these tools to work, so we’re going to replace their binaries with simple no-op scripts.
Run the following commands to create a new image and edit its Dockerfile:
docker tag "sailfish-sdk-build-engine:${USER}" "sailfish-sdk-build-engine:${USER}-unpatched"
mkdir ~/sailfish-be-patch/
nano ~/sailfish-be-patch/Dockerfile
Paste the following into the Dockerfile, replacing YOURUSERNAME with the username of your user in the VM:
FROM sailfish-sdk-build-engine:YOURUSERNAME-unpatched

# Fix setarch calls by making them no-op. We're already in i386 QEMU environment so we don't need them.
RUN mv /usr/bin/setarch /usr/bin/setarch.real \
    && printf '%s\n' \
        '#!/bin/sh' \
        'if [ "$1" = "i386" ]; then shift; fi' \
        'exec "$@"' \
        > /usr/bin/setarch \
    && chmod 0755 /usr/bin/setarch

# Get rid of the iptables errors by making it no-op, we don't need it.
RUN backend="$(readlink -f "$(command -v iptables)")" \
    && mv "$backend" "${backend}.real" \
    && printf '%s\n' \
        '#!/bin/sh' \
        'exit 0' \
        > "$backend" \
    && chmod 0755 "$backend"

# This helper hangs in loginctl under QEMU, preventing init.container
# from reaching the official SSH startup.
RUN mkdir -p /usr/libexec/sdk-setup/disabled-oneshots \
    && mv /etc/oneshot.d/0/late/udisks2-symlink-mount-path \
            /usr/libexec/sdk-setup/disabled-oneshots/
Run
docker build --platform linux/386 --tag "sailfish-sdk-build-engine:${USER}" ~/sailfish-be-patch/The container should build successfully. If it says that the image is not found, remove the Sailfish SDK using the official uninstaller and reinstall the SDK making sure that
DOCKER_DEFAULT_PLATFORMis set correctly. -
Open a new terminal tab (the command can hang for a very long time if something goes wrong) and run
QT_LOGGING_RULES='sfdk.queue.debug=true' ~/SailfishOS/bin/sfdk engine start. After a minute or two it should exit successfully. If it did, congratulations! You’ve successfully set up the build engine! If it didn’t, make sure you set up the patched Docker image correctly. -
At this point you can open Sailfish IDE, create a simple Sailfish app project and build it using the hammer button. The IDE might be slow for a bit and hang a few times after the project gets opened, that’s normal, just give it some time.
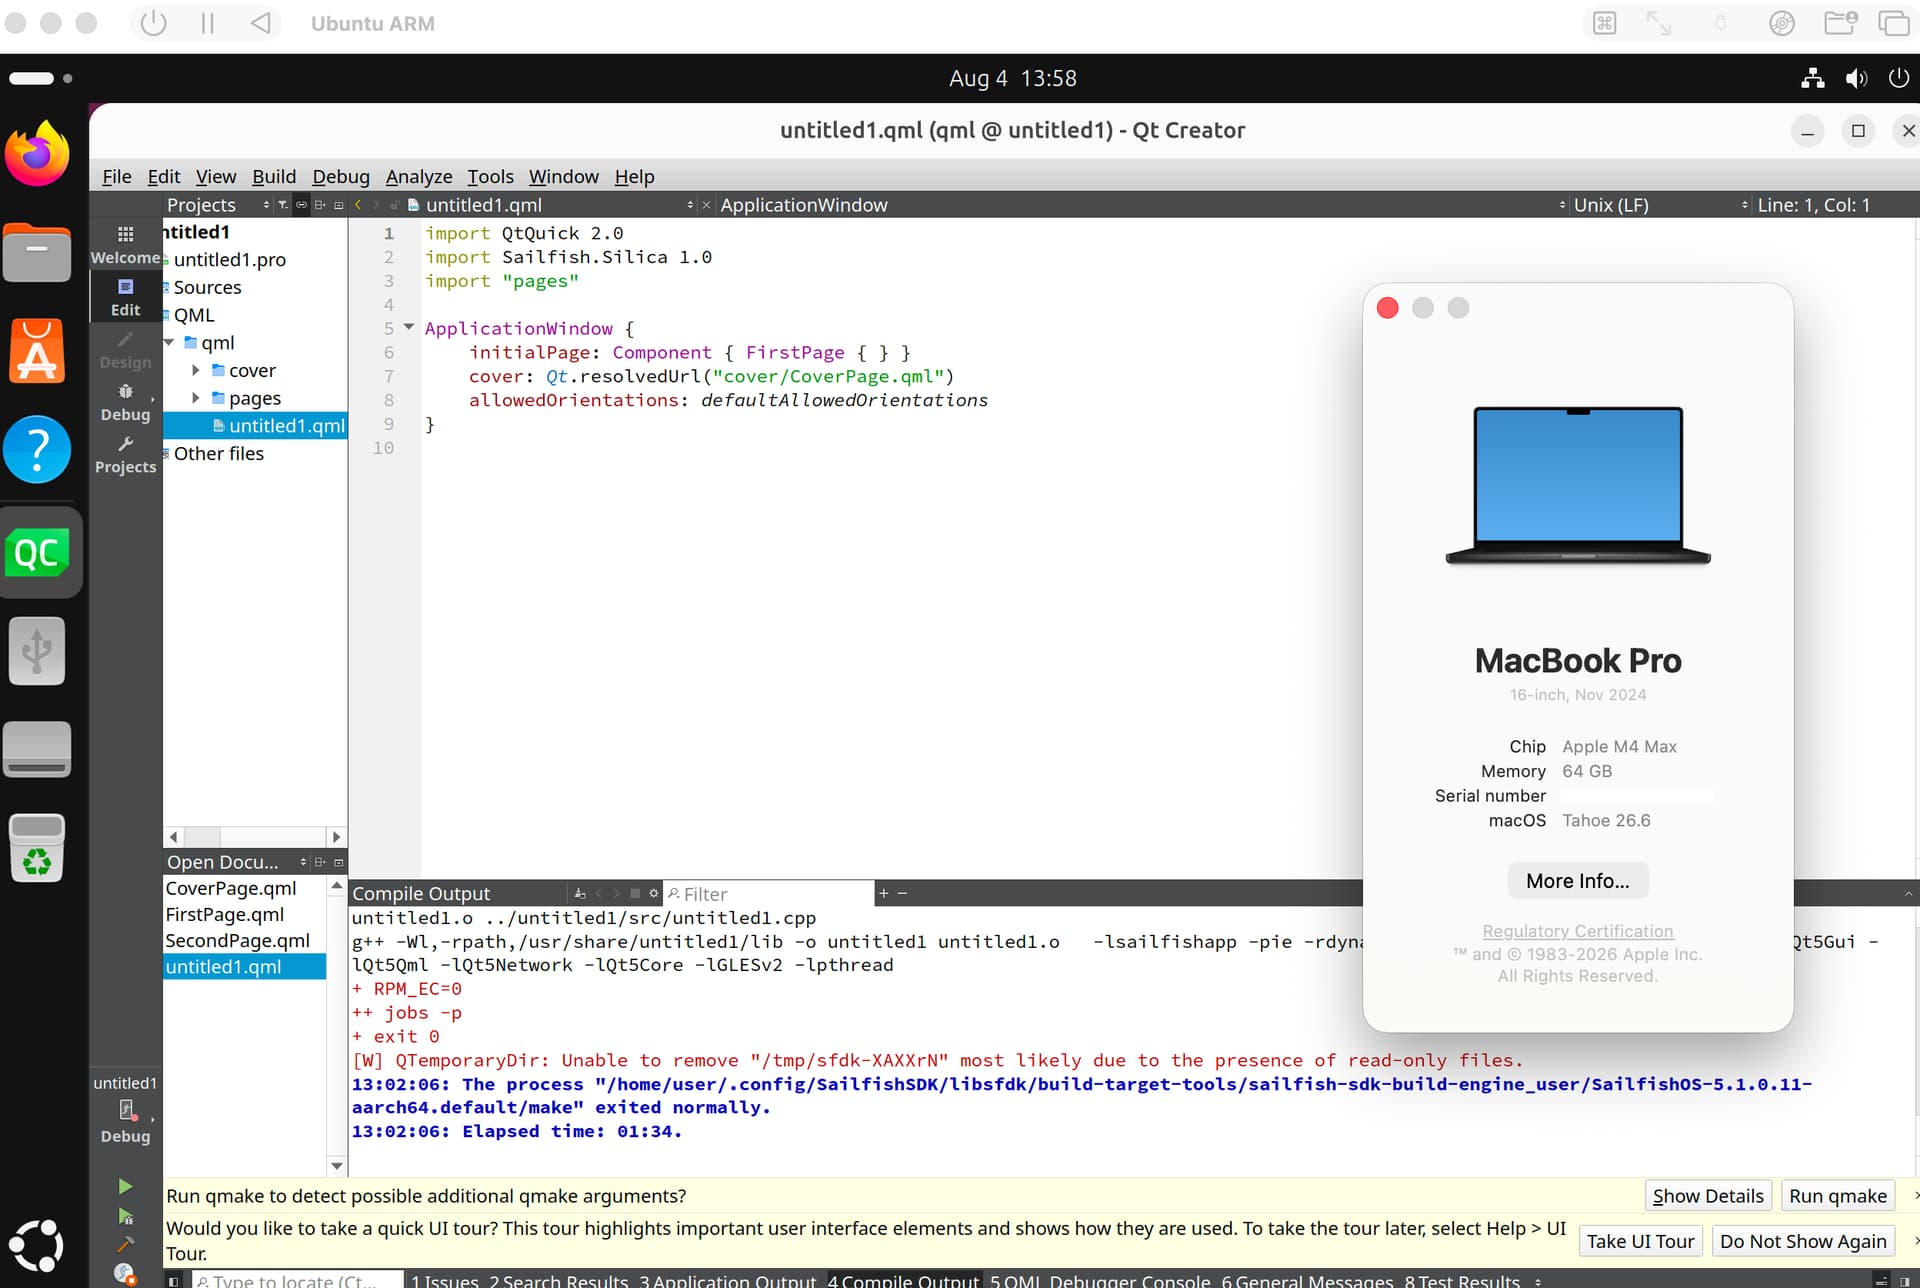
This guide does not cover running a Sailfish emulator, the expectation is that you will build .rpm files and test them on a device. This will also break if you update the SDK, so everything starting from the Docker patching part would need to get done again.
