REPRODUCIBILITY (% or how often): Every time
BUILD ID = OS VERSION: 4.1.0.24
HARDWARE : XA2
UI LANGUAGE: English
REGRESSION: (compared to previous public release: Yes, No, ?): No.
DESCRIPTION:
When an android app asks for an permission (eg. location) I can’t press “accept” in the pop-up I am only able to deny.
If I go through the sailfish settings → Apps → (android app) → Open Android settings → permissions and accept it there it works.
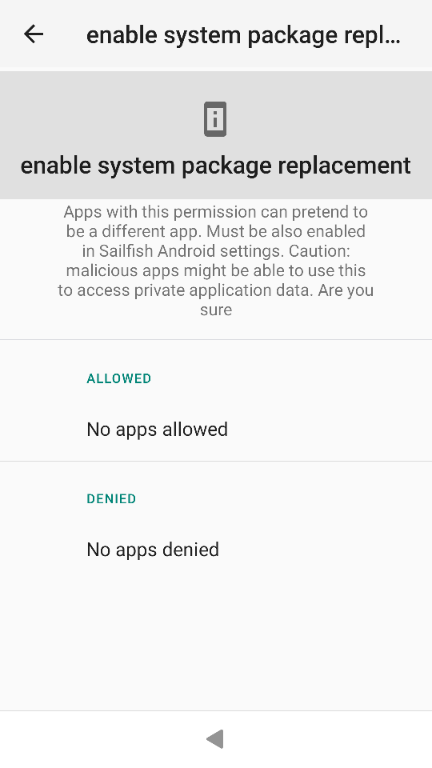
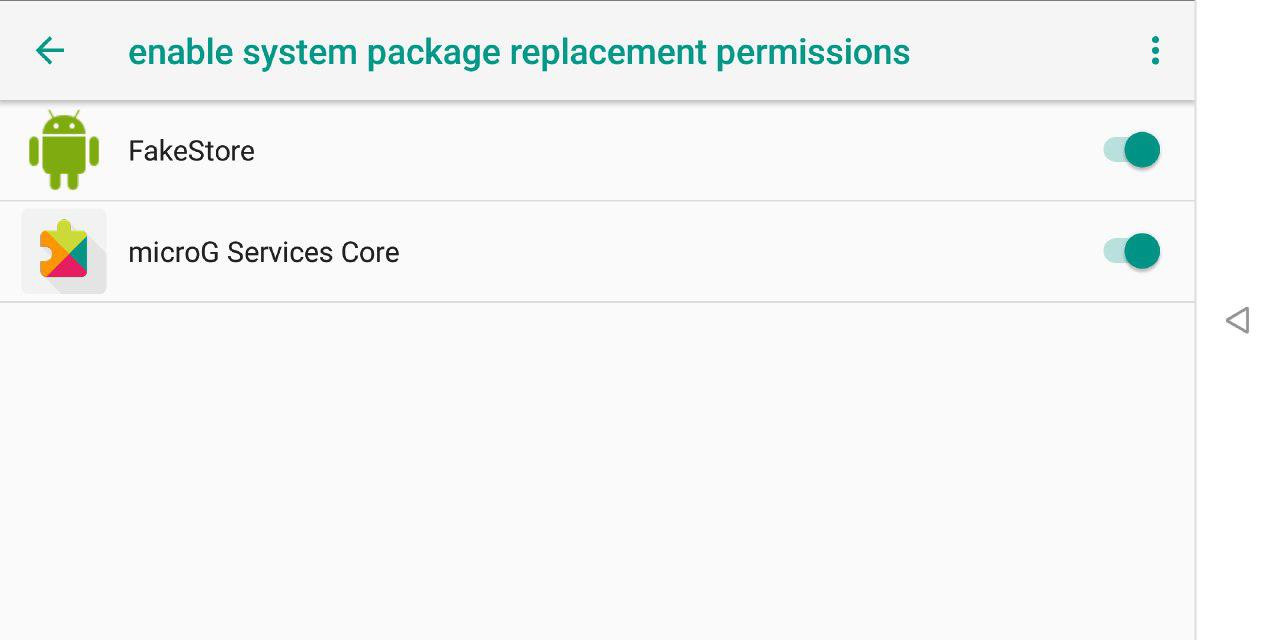
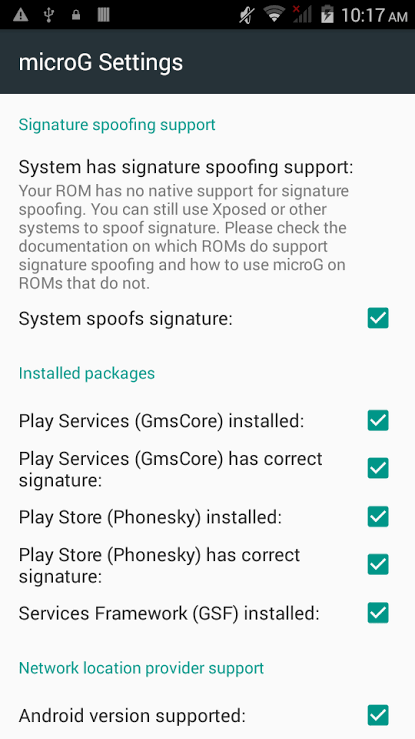
For microG accepting the system package replacement / signature spoofing in the Android settings doesn’t work at all.
Interesting … I’ve never experienced such. What has happened to me before is that attempting to open an aop from another app, (e.g. installing an app from Aurora Store and then pressing ‘open’), will cause the screen with the ‘accept permissions’ dialog to be inaccessible. I can see it in the switcher, but when I tap the cover, there is just a blank screen. I realized that closing the other app, (e.g. Aurora), will make the one I’m trying to access accessible …
I’ve followed DrYak’s guide several times since he posted it, and always working fine for me, (however, I am not on 4.1 yet, so can only speak for 3.4 to 4.0)…
Thanks! Unfortunately isn’t a section in the tutorial which mentions a symlink
I followed the instructions (also the pre-requisits where I had to force re-install AlienDalvik) until “enable system package replacement” in the Android settings.
When I go into the app the request the permission but I can’t accept it…
One thing I noticed is, that the tutorial what written for SFOS 3.1 but I am on a more recent version.
As I have said, signature spoofing will not work without a symlink. AD seems to be hardcoded to utilize /home/nemo. Symlinking to /home/defaultuser fixes the issue, even if it is an ugly solution.